In the competitive world of metal component manufacturing, aluminum die casting stands out for its ability to produce high-volume, complex, and dimensionally stable parts with excellent strength-to-weight ratios. However, the high-pressure, high-speed nature of the process makes it susceptible to specific defects that can compromise part integrity, aesthetics, and functionality. For a aluminum die casting factory, mastering defect prevention is not just about quality—it’s directly tied to profitability, on-time delivery, and customer trust.
This comprehensive guide is designed as a practical manual for engineers, production managers, and quality control specialists. We will systematically break down the top 10 aluminum die casting defects, providing not just identification tips but proven, actionable solutions to eliminate them at the source. Our goal is to help you achieve flawless production and secure your position as a leader in precision manufacturing.
Understanding Defects: Root Causes and Impact
Defects rarely have a single cause. They typically arise from an imbalance in one or more of the “Four Pillars of Stable Casting”:
Tooling (Mold) Design & Condition: The heart of the process.
Process Parameters: Temperature, injection speed/pressure, and timing.
Material Quality: Alloy composition, melt cleanliness, and temperature.
Machine Performance: Clamping force, shot end control, and lubrication.
Ignoring these defects leads to spiraling costs: increased scrap rates, expensive rework, production downtime, and potential warranty claims. A proactive approach to defect analysis is the hallmark of a world-class foundry specializing in aluminum die work.
The Top 10 Aluminum Die Casting Defects: Causes and Solutions
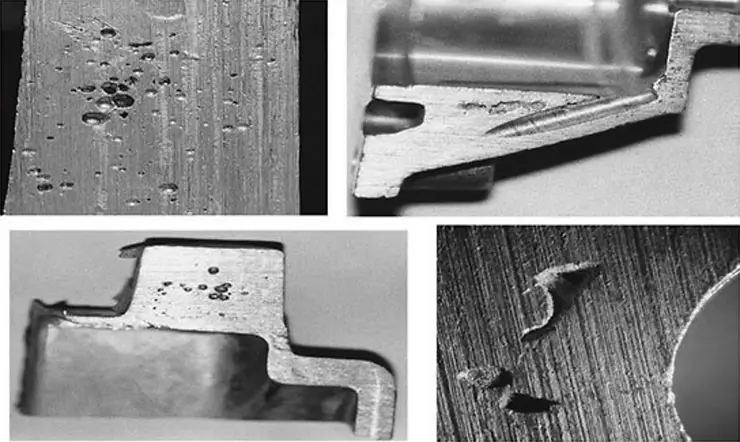
1. Porosity (Gas and Shrinkage)
Definition: Voids or holes within the casting, classified as gas porosity (round, smooth walls) or shrinkage porosity (irangular, jagged edges).
Causes: Gas porosity is caused by entrapped air or gas from lubricant burn-off. Shrinkage porosity occurs when inadequate molten metal feeds a section as it solidifies in the aluminum die.
Solutions:
Optimize the venting system in the aluminum die to allow air to escape.
Adjust slow shot speed to prevent turbulent filling and air entrapment.
Increase intensification (holding) pressure to feed metal into solidifying areas.
Ensure proper metal temperature (not too high to absorb gas, not too low to cause shrinkage).
Use degassed and clean aluminum alloy.

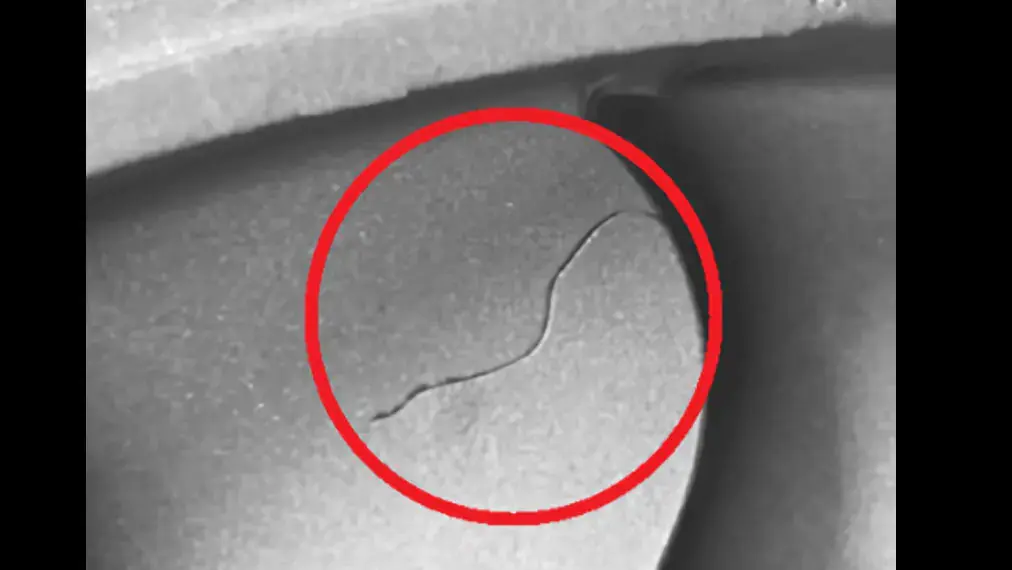
2. Cold Shuts or Cold Flaws
Definition: A visible line or seam on the part where two fronts of molten metal met but failed to fuse properly.
Causes: Metal temperature too low, slow injection speed, or poor gating design in the aluminum die leading to premature cooling.
Solutions:
Increase melt and aluminum die temperature in the affected area.
Increase injection speed to ensure metal fronts meet while still sufficiently liquid.
Redesign gates and runners in the aluminum die to improve flow and reduce heat loss.
Check for excessive aluminum die lubricant, which can cool the metal stream.

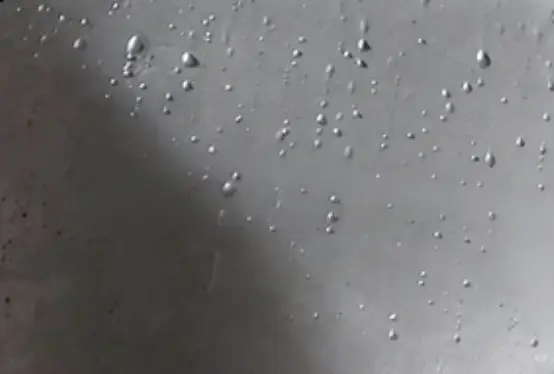
3. Surface Blistering
Definition: Raised bumps or bubbles on the casting surface, often appearing after thermal treatment or painting.
Causes: Subsurface gas porosity (from lubricant or air) expands when heated, pushing the surface out.
Solutions:
Solutions are similar to gas porosity: improve venting and shot profile.
Allow sufficient cooling time in the mold before ejection.
Adjust die lubricant type and amount – too much or improperly applied lubricant causes blistering.
Ensure die temperature control is stable and uniform.

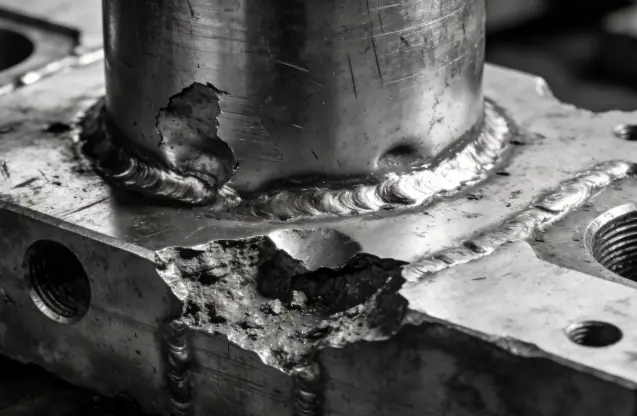
4. Solder (Soldering)
Definition: Aluminum alloy welds itself to the steel aluminum die surface, causing severe damage to the mold and rough patches on the casting.
Causes: High metal temperature, high injection speed, insufficient or improper die coating/lubrication, and certain iron-poor alloy compositions.
Solutions:
Apply a premium die coating (e.g., nitriding, PICVD) with high resistance to soldering.
Optimize process temperatures to the lower effective range.
Ensure a consistent, high-quality die lubricant film.
Review alloy composition; consider adding a small percentage of iron to the alloy if design allows.

5. Flow Marks and Erosion Marks
Definition: Flow marks are wavy lines on the surface; erosion marks are rough patches where metal has scoured the die.
Causes: Flow marks occur from too low metal or die temperature, causing premature solidification during flow. Erosion is caused by high-velocity metal flow striking specific die areas.
Solutions:
For flow marks: increase metal temperature and injection speed slightly.
For erosion marks: modify gating design to reduce direct jetting; check for local overheating in the die; consider strengthening the die material in that area.
6. Lamination (Cold Flake)
Definition: A thin layer of metal on the part’s surface that appears separated or flaking, often detected during machining.
Causes: A skin of metal solidifies prematurely, then folds over as the cavity fills due to incorrect gate position or slow filling.
Solutions:
Increase gate velocity to ensure a single, coherent flow front.
Adjust gate location and geometry to promote directional solidification.
Increase mold temperature to delay premature solidification.
7. Incomplete Filling (Short Shot)
Definition: The mold cavity is not completely filled, resulting in a missing section of the part.
Causes: Insufficient metal, low metal temperature, low injection pressure/speed, excessive lubricant, or blocked vents.
Solutions:
Increase shot volume and injection pressure/speed.
Raise metal and die temperatures.
Check and clear venting channels.
Reduce the amount of die lubricant applied.
8. Ejector Pin Marks & Sticking
Definition: Indentations, distortions, or tears at ejector pin locations. Sticking is when the part resists ejection.
Causes: Incorrect ejector pin alignment, worn pins, insufficient draft angles, high vacuum due to poor venting, or die temperature issues.
Solutions:
Ensure proper draft angles on the design.
Maintain and align ejector pins regularly.
Improve venting to reduce vacuum.
Polish sticking areas of the die cavity.
Optimize cooling time and ejection force/timing.
9. Flash (Burrs)
Definition: A thin fin or excess metal escaping at the die parting line, around cores, or at ejector pins.
Causes: Excessive injection pressure, insufficient clamping force, die wear/ damage, or foreign debris on die faces.
Solutions:
Verify clamping force is adequate for the projected area of the part.
Inspect and maintain die surfaces for wear and damage (re-face if necessary).
Ensure die cleanliness and proper alignment before each cycle.
Slightly reduce injection pressure if other factors are correct.
10. Cracks (Hot Tearing and Stress Cracks)
Definition: Fractures in the casting, often at junctions or thick-to-thin transitions. Hot tears are jagged and occur during solidification; stress cracks are straighter and occur after ejection.
Causes: Hot tears are due to restricted contraction during solidification. Stress cracks are from excessive residual stress during ejection or handling.
Solutions:
Modify part and die design with smoother transitions and radii.
Optimize cooling system to promote uniform solidification.
Adjust ejection system to be more balanced and gradual.
Consider an alloy with better hot tear resistance.
The Proactive Framework: Preventing Defects Before They Start
Solving defects reactively is costly. The best factories prevent them.
Simulation Software: Use mold flow analysis (e.g., MAGMAsoft, FLOW-3D) before cutting steel to predict filling, cooling, and potential defect locations.
Tooling Investment: High-quality mold steel, precise temperature control (conformal cooling), and robust gating/venting design are non-negotiable.
Process Standardization: Develop, document, and strictly control the optimal window for every parameter (temperatures, speeds, pressures, lubrication cycles).
Material Management: Implement strict melt house practices for alloying, degassing, and temperature holding.
Data-Driven Monitoring: Utilize modern die casting machines with real-time monitoring and SPC (Statistical Process Control) to detect subtle process drifts before they cause defects.
Advanced Troubleshooting: A Systematic Approach
When a defect appears:
Document: Take photos, note the location on the part and in the mold.
Isolate: Check if it’s on every cycle or intermittent. Check specific cavities in multi-cavity molds.
Analyze: Use a defect-cause matrix to match symptoms with the most likely pillar (Tooling, Process, Material, Machine).
Act and Verify: Make one change at a time, document the result.
Commitment to Continuous Improvement
Achieving flawless aluminum die casting production is a continuous journey rooted in deep process understanding, precise control, and unwavering attention to detail. By systematically addressing the top 10 defects outlined in this guide, you can significantly reduce scrap, improve efficiency, and deliver superior quality to your customers. Remember, in today’s market, excellence in manufacturing is not just an option—it’s the defining factor for success.
Partner with a foundry that masters the science behind the art. IEC Mould leverages decades of expertise and cutting-edge technology to deliver defect-free aluminum die castings, consistently.
Frequently Asked Questions (FAQs)
Q: What is the most common defect in aluminum die casting?
A: Porosity is arguably the most common and challenging defect, as it can originate from multiple sources (gas entrapment, shrinkage). A systematic approach to process and aluminum die tooling is key to controlling it.
Q: Can porosity be fixed after casting?
A: Surface porosity can sometimes be sealed with impregnation processes for pressure-tight applications. However, internal structural porosity cannot be “fixed.” Prevention is the only reliable solution for high-integrity parts from your aluminum die.
Q: How often should a die casting mold be maintained?
A: It depends on the alloy, part complexity, and volume. A rigorous preventive maintenance schedule for your aluminum die should include daily cleaning, weekly inspections of moving parts and vents, and a major refurbishment after a set number of cycles (e.g., 50,000-150,000).
Q: What are the signs of a poorly designed gating system?
A: Excessive turbulence, air entrapment, cold shuts, lamination, and solder/erosion in specific areas are strong indicators. Simulation software is invaluable for optimizing gating in the aluminum die before production.
Q: How do you choose the right aluminum alloy for die casting to minimize defects?
A: Consider the part’s function. For thin walls and complex shapes, a high-fluidity alloy like A380 is common. For better corrosion resistance or strength, consider A360 or A413. Discuss with your material supplier to balance castability with final properties for your specific aluminum die project.

